Home
Did you get to this wiki from a direct link? First read the instructions below and then click <> Code in the top-left to reach the docs files.
The very first thing you should do before you install this documentation is to make sure Sumneko's Lua Server is installed in VSCode as the docs rely on it.
Don't want to deal with the installation process?
There's an installer included for automatic installation and updating of the docs.
Click to view
-
If you want something to install the docs for you, right click the image below and click Save link as... to download the installer.
 install.bat
Once you download the file, put it in the folder you wish to install the docs in.
Put it in the same spot as your avatar's avatar.json file.If you are on Windows, just double‑click the file to start it.
If you are on Linux, run the file withbash ./install.bat.
Want to do everything by yourself or just don't trust the installer?
Here's the instructions for manually installing the docs.
Click to view
-
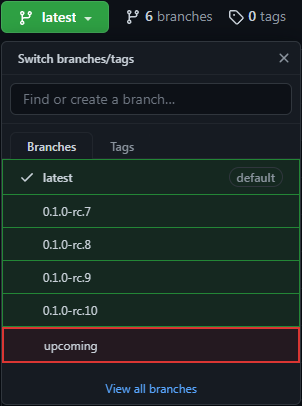
First, determine which version of the docs you need.
If the version you need is the latest available version of Figura, skip to the next step.
If the version you need is not the latest available version of Figura, click
├┘ Latest ▾and select the version you need.
Do not select "upcoming" unless you know what you are doing.
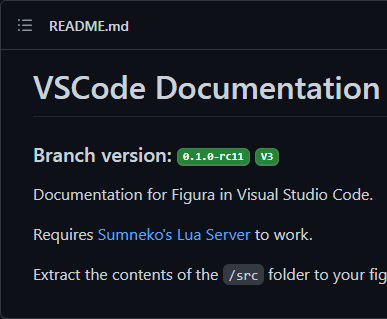
If you are not sure which version you have selected, view the README below the file list. It will contain the Figura version that the currently selected branch represents.
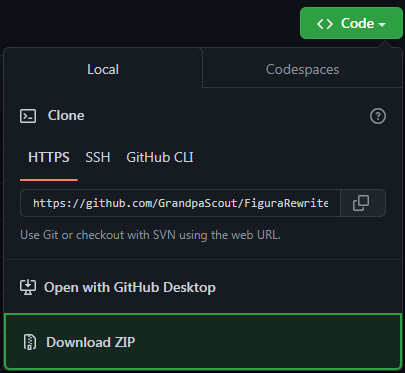
Click the
<> Code ▾button and click "Download ZIP"Once the zip is downloaded, open it and go to the
srcfolder.
Drag the contents of that folder to folder that contains your avatar's avatar.json file.
If you have no issues, feel free to skip this section.
If the docs don't seem to be working, there are several things you can try to fix them.
Make sure you have Sumneko's Lua Server installed as the docs will not work without it.
![]() You can quickly test if it is installed properly by typing
You can quickly test if it is installed properly by typing local variable into a lua file and hovering over variable. You should get something similar to the image on the right.
![]()
If you installed the docs while VSCode was running, you might need to reload it so the docs can be found.
To reload VSCode, press Ctrl+Shift+P or F1, type >reload window, and press Enter.
![]()
If you installed the docs with the automatic installer, launch it again and see if a [C] option appears. If it does not, try installing again.
(If it does, just press enter twice without inputting anything else to exit.)
If you installed the docs manually, make sure the .vscode folder is in the same folder as the .code‑workspace file and make sure the .luarc file exists.
If you installed the docs in a single avatar, make sure you are opening the .code‑workspace file inside of that avatar's folder.
Once you have installed the docs, you can now open the .code‑workspace file to open VSCode and begin coding.
If you used the installer, the file will be called <FOLDER_NAME>.code‑workspace.
If you installed manually, the file will likely be called avatar.code‑workspace.
 To check if the docs are working, type
 player into a lua file and hover over it with your cursor. Something similar to the image on the right should appear.
Once you have confirmed the docs are working, just start typing. As you type, the Language Server will start suggesting classes, functions, methods, and so on.
If you do not understand how to use a function, class, or method or what it does, hover over it to receive help for it.
Some larger classes may require scrolling down to get to the description.
![]()