This is a ChatGPT-4 English adaptation of the original document by kohya-ss (train_README-ja.md)
There may be errors in the description due to document updates.
In this repository, we support the fine-tuning of models, DreamBooth, and the learning of LoRA and Textual Inversion (including XTI:P+). This document explains the common preparation methods for learning data and options.
Please refer to the README of this repository beforehand and set up the environment.
The following will be explained:
- Preparation of learning data (using the new format with configuration files)
- A brief explanation of the terms used in learning
- Previous specification method (specifying from the command line without using a configuration file)
- Sample image generation during learning
- Commonly used options in each script
- Metadata preparation for fine-tuning method: captioning, etc.
You can learn by just executing 1 (see each script's documentation for learning). Refer to 2 and later as needed.
Prepare image files for learning data in any folder (multiple folders are also acceptable). Supported formats are .png, .jpg, .jpeg, .webp, and .bmp. Preprocessing such as resizing is generally not necessary.
However, it is recommended to avoid using images that are significantly smaller than the learning resolution (described later) or to enlarge them in advance using super-resolution AI. Also, it seems that errors may occur with images larger than extremely large images (around 3000x3000 pixels), so please reduce their size beforehand.
When learning, you need to organize the image data to be learned by the model and specify it to the script. You can specify the learning data in several ways, depending on the number of learning data, learning target, whether captions (image descriptions) can be prepared, etc. The following methods are available (the names of each method are not general, but are unique to this repository). Regularization images will be discussed later.
-
DreamBooth, class+identifier method (regularization images can be used)
Learn by associating the learning target with a specific word (identifier). There is no need to prepare captions. For example, when learning a particular character, it is easy to use because there is no need to prepare captions. However, since all elements of the learning data, such as hairstyle, clothing, and background, are learned by associating them with the identifier, situations such as not being able to change clothes in the generated prompt may occur.
-
DreamBooth, caption method (regularization images can be used)
Prepare a text file with captions recorded for each image and learn. For example, when learning a specific character, by describing the details of the image in the caption (character A in white clothes, character A in red clothes, etc.), the character and other elements are separated, and the model can be expected to learn the character more precisely.
-
Fine-tuning method (regularization images cannot be used)
The captions are collected in a metadata file in advance. It supports functions such as managing tags and captions separately and speeding up learning by pre-caching latents (explained in separate documents). (Although it is called the fine-tuning method, it can also be used for non-fine-tuning.)
The combination of what you want to learn and the available learning methods are as follows:
| Learning target or method | Script | DB / class+identifier | DB / Caption | fine-tuning |
|---|---|---|---|---|
| Fine-tuning the model | fine_tune.py |
x | x | o |
| DreamBooth the model | train_db.py |
o | o | x |
| LoRA | train_network.py |
o | o | o |
| Textual Inversion | train_textual_inversion.py |
o | o | o |
For LoRA and Textual Inversion, if you want to learn without having to prepare a caption file, the DreamBooth class+identifier method is a good choice. If you can prepare, the DreamBooth caption method is recommended. If you have a large number of learning data and do not use regularization images, consider the fine-tuning method as well.
For DreamBooth, the same applies, but the fine-tuning method cannot be used. In the case of fine-tuning, only the fine-tuning method is available.
Here, only typical patterns for each specification method are explained. For more detailed specification methods, please see Dataset Configuration.
In this method, each image is learned as if it was learned with the caption class identifier (e.g., shs dog).
Decide on the word identifier to associate with the learning target and the class to which the target belongs.
(There are various names such as instance, but for now, we will follow the original paper.)
Here is a brief explanation (please investigate further for details).
The class is a general category of the learning target. For example, if you want to learn a specific dog breed, the class would be dog. For anime characters, depending on the model, it could be boy, girl, 1boy, or 1girl.
The identifier is used to identify and learn the learning target. Any word is acceptable, but according to the original paper, "a rare word of 3 characters or less that is 1 token in the tokenizer" is preferred.
By using the identifier and class, for example, learning the model with "shs dog" allows the learning target to be identified and learned from the class.
When generating images, specifying "shs dog" will generate images of the learned dog breed.
(For reference, here are some identifiers I've been using recently: shs sts scs cpc coc cic msm usu ici lvl cic dii muk ori hru rik koo yos wny. Ideally, it should not be included in the Danbooru Tag.)
Regularization images are images used to prevent the entire class from being pulled by the learning target (language drift). If you do not use regularization images, for example, if you learn a specific character with shs 1girl, even if you generate a simple 1girl prompt, it will resemble that character. This is because 1girl is included in the learning caption.
By learning the target images and regularization images together, the class remains as a class, and the learning target is generated only when the identifier is included in the prompt.
If you only need a specific character to come out in LoRA or DreamBooth, you don't need to use regularization images.
Textual Inversion does not need to be used (because nothing is learned when the token string to be learned is not included in the caption).
For regularization images, it is common to use images generated with only the class name for the learning target model (e.g., 1girl). However, if the quality of the generated image is poor, you can also use images downloaded separately from the internet or modify the prompt.
(Since the regularization images are also learned, their quality affects the model.)
Generally, it is desirable to prepare about several hundred images (if the number is small, the class images will not be generalized, and their features will be learned).
For generated images, usually, match the size of the generated images to the learning resolution (more precisely, the resolution of the bucket, described later).
Create a text file and set the extension to .toml. For example, you can write it as follows:
[general]
enable_bucket = true                        # Whether to use Aspect Ratio Bucketing

[[datasets]]
resolution = 512                            # Training resolution
batch_size = 4                              # Batch size

  [[datasets.subsets]]
  image_dir = 'C:\hoge'                     # Specify the folder containing the training images
  caption_extension = '.caption'            # Caption file extension; change this if using .txt
  num_repeats = 10                          # Number of repetitions for training images

  # Write the following only when using regularization images. Remove it if not using them.
  [[datasets.subsets]]
  is_reg = true
  image_dir = 'C:\reg'                      # Specify the folder containing the regularization images
  class_tokens = 'girl'                     # Specify the class
  num_repeats = 1                           # Number of repetitions for regularization images; 1 is usually sufficient
You can start training by simply changing the following:
-
Training resolution
-
Batch size
-
Folder specification
-
Caption file extension
Any extension can be specified.
-
Number of repetitions
Please refer to each document for training.
Metadata is a management file that compiles captions and tags. It is in JSON format with the extension .json. The creation method is lengthy, so it is written at the end of this document.
Create a text file and set the extension to .toml. For example, you can write it as follows:
[general]
shuffle_caption = true
keep_tokens = 1

[[datasets]]
resolution = 512                                    # Training resolution
batch_size = 4                                      # Batch size

  [[datasets.subsets]]
  image_dir = 'C:\piyo'                             # Specify the folder containing the training images
  metadata_file = 'C:\piyo\piyo_md.json'            # Metadata file name
You can start training by simply changing the following. The parts not specifically mentioned are the same as DreamBooth and class+identifier methods:
-
Training resolution
-
Batch size
-
Folder specification
-
Metadata file name
Specify the metadata file created using the method described later. ---CUT---
Please conduct the learning process based on each document.
These explanations are simplified, and I don't fully understand every detail, so please research further on your own.
This term refers to the process of training and adjusting a model. Fine-tuning can have different meanings depending on the context. In a narrow sense, fine-tuning in the case of Stable Diffusion means training the model on images and captions. DreamBooth is a specific method of fine-tuning in this narrow sense. In a broader sense, fine-tuning includes methods such as LoRA, Textual Inversion, and Hypernetworks, and encompasses all aspects of model training.
Roughly speaking, one step involves performing calculations on the training data once. One step is defined as "feeding the captions of the training data into the current model, comparing the resulting images with the images in the training data, and slightly modifying the model to make it closer to the training data."
The batch size is a value that specifies how many data points are calculated together in one step. By calculating data points together, the speed of the process is relatively improved. Generally, it is believed that a larger batch size leads to higher accuracy.
The total number of data points used in training is the product of the batch size and the number of steps. Therefore, if you increase the batch size, you should reduce the number of steps.
However, for example, "1,600 steps with a batch size of 1" and "400 steps with a batch size of 4" will not produce the same results. With the same learning rate, the latter is generally more prone to undertraining. You may need to adjust the learning rate slightly (e.g., 2e-6) or increase the number of steps to 500 to compensate.
Increasing the batch size consumes more GPU memory. If you run out of memory, you will encounter errors, and if you are on the edge of running out, the training speed will decrease. It is a good idea to adjust the batch size while monitoring the memory usage in the Task Manager or with the nvidia-smi command.
Note that a "batch" is a unit of data.
Roughly speaking, the learning rate indicates how much the model changes at each step. A larger value speeds up the learning process but may cause the model to change too much, resulting in a broken model or failure to reach an optimal state. A smaller value slows down the learning process and may still fail to reach an optimal state.
The learning rate varies significantly for fine-tuning, DreamBooth, and LoRA, as well as for the training data, the model to be trained, and the batch size and number of steps. Start with a general value and adjust it based on the learning progress.
By default, the learning rate is constant throughout the training process. The learning rate can change depending on the scheduler specified, which may affect the results.
An epoch is completed when the training data has been processed once (i.e., when the data has made one round). If you specify a number of repetitions, one epoch is completed after the repeated data has made one round.
The number of steps in one epoch is generally number of data points / batch size. However, with Aspect Ratio Bucketing, the number of steps increases slightly (since different bucket data cannot be combined into the same batch, the number of steps increases).
Stable Diffusion v1 is trained at 512x512 resolution, but it also trains at other resolutions such as 256x1024 and 384x640. This reduces the amount of trimming and allows for more accurate learning of the relationship between captions and images.
Furthermore, it is no longer necessary to standardize the aspect ratio of image data in advance, as any resolution can be used for training.
You can enable or disable this feature in the settings. In the examples of configuration files provided so far, it is enabled (true is set).
Training resolutions are created and adjusted in increments of 64 pixels (default, changeable) in width and height, within the range that does not exceed the area (i.e., memory usage) of the specified resolution.
In machine learning, it is common to standardize input sizes, but there is no particular constraint on this, and it is actually sufficient to standardize batch sizes. NovelAI's bucketing seems to mean pre-classifying the training data by learning resolution according to the aspect ratio. By creating batches from images within each bucket, the batch image size is standardized.
This method involves specifying options directly from the command line without using a .toml file. There are DreamBooth class+identifier methods, DreamBooth caption methods, and fine-tuning methods.
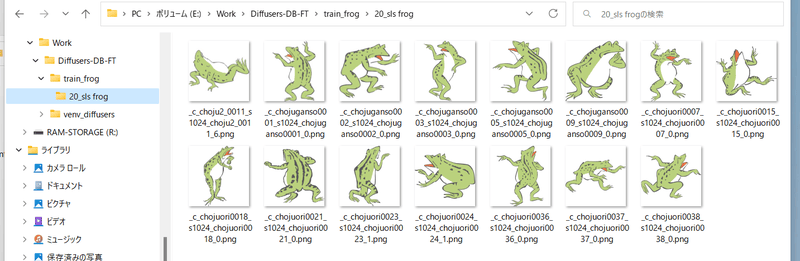
Create a folder for the training images. Within this folder, create directories named as follows:
<number of repetitions>_<identifier> <class>
Don't forget the underscore (_) between them.
For example, if you want to train with the "sls frog" prompt and repeat the data 20 times, the directory will be named "20_sls frog". The structure will look like this:
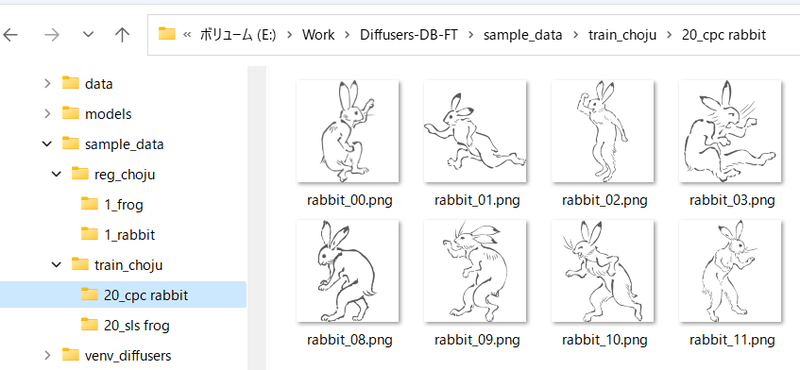
To train with multiple classes or targets, simply prepare multiple folders in the format "number of repetitions_ " within the training image folder, and multiple folders in the format "number of repetitions_" within the regularization image folder.
For example, if you want to train with both "sls frog" and "cpc rabbit" prompts, the structure will look like this:
If there is only one class with multiple targets, you only need one regularization image folder. For example, if there are characters A and B in the 1girl class, do the following:
- train_girls
- 10_sls 1girl
- 10_cpc 1girl
- reg_girls
- 1_1girl
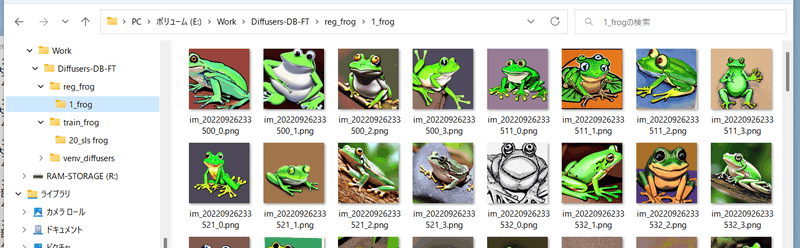
This step is for when you want to use regularization images.
Create a folder for regularization images. Within this folder, create a directory named as follows:
<number of repetitions>_<class>
For example, if you want to train with the "frog" prompt and not repeat the data (only use it once), the structure will look like this:
Run the respective learning scripts. Use the --train_data_dir option to specify the parent folder of the training data (not the folder containing the images), and the --reg_data_dir option to specify the parent folder of the regularization images (not the folder containing the images).
By placing files with the same file name as the images and with the .caption extension (changeable with options) in the training image and regularization image folders, the script will read the captions from those files and use them for training.
Please note that the folder names (identifier class) will not be used for training these images.
The caption file extension is .caption by default, but it can be changed using the --caption_extension option in the learning script. The --shuffle_caption option allows you to shuffle the comma-separated parts of the caption during training.
---CUT---
The process of creating metadata is the same as when using a configuration file. Specify the metadata file with the in_json option.
You can check the progress of the training by generating images with the model during training. Specify the following options in the training script:
-
--sample_every_n_steps/--sample_every_n_epochsSpecify the number of steps or epochs for sample output. Samples will be output every specified number. If both are specified, the number of epochs will take precedence.
-
--sample_promptsSpecify the file containing the prompts for sample output.
-
--sample_samplerSpecify the sampler to be used for sample output. You can choose from
'ddim', 'pndm', 'heun', 'dpmsolver', 'dpmsolver++', 'dpmsingle', 'k_lms', 'k_euler', 'k_euler_a', 'k_dpm_2', 'k_dpm_2_a'.
To generate sample output, you need to prepare a text file with prompts written in advance. Write one prompt per line.
For example, the following:
# prompt 1
masterpiece, best quality, 1girl, in white shirts, upper body, looking at viewer, simple background --n low quality, worst quality, bad anatomy, bad composition, poor, low effort --w 768 --h 768 --d 1 --l 7.5 --s 28

# prompt 2
masterpiece, best quality, 1boy, in business suit, standing at street, looking back --n low quality, worst quality, bad anatomy, bad composition, poor, low effort --w 576 --h 832 --d 2 --l 5.5 --s 40
Lines starting with # are treated as comments. You can specify options for the generated image with " -- + lowercase letter", such as --n. The following can be used:
--nTreat everything until the next option as a negative prompt.--wSpecify the width of the generated image.--hSpecify the height of the generated image.--dSpecify the seed for the generated image.--lSpecify the CFG scale for the generated image.--sSpecify the number of steps during generation.
After updating the script, there may be cases where the documentation has not caught up. In that case, check the available options with the --help option.
-
--v2/--v_parameterizationIf you want to use Hugging Face's stable-diffusion-2-base or its fine-tuned model as the target model for training (models that are instructed to use
v2-inference.yamlduring inference), specify the--v2option. If you want to use stable-diffusion-2 or 768-v-ema.ckpt and their fine-tuned models (models that are instructed to usev2-inference-v.yamlduring inference), specify both the--v2and--v_parameterizationoptions.The main differences in Stable Diffusion 2.0 are:
- Tokenizer used
- Text Encoder and output layer used (2.0 uses the second-to-last layer)
- Output dimension of Text Encoder (768->1024)
- U-Net structure (such as the number of heads in CrossAttention)
- v-parameterization (sampling method seems to have changed)
The base version adopts 1-4, while the non-base version (768-v) adopts 1-5. The v2 option enables 1-4, and the v_parameterization option enables 5.
-
--pretrained_model_name_or_pathSpecifies the base model for additional training. You can specify Stable Diffusion checkpoint files (.ckpt or .safetensors), Diffusers model directories on your local disk, or Diffusers model IDs (such as "stabilityai/stable-diffusion-2").
-
--output_dirSpecifies the folder where the trained model will be saved.
-
--output_nameSpecifies the file name of the model without the extension.
-
--dataset_configSpecifies the
.tomlfile containing the dataset settings. -
--max_train_steps/--max_train_epochsSpecifies the number of training steps or epochs. If both are specified, the number of epochs takes precedence.
-
--mixed_precisionUses mixed precision (mixed accuracy) for training to save memory. Specify as
--mixed_precision="fp16". Compared to no mixed precision (default), the accuracy may be lower, but the GPU memory required for training will be significantly reduced.(For RTX 30 series and later, you can also specify
bf16. Please match the settings made to accelerate during environment preparation). -
--gradient_checkpointingReduces the GPU memory required for training by calculating weights in small increments rather than all at once. Turning this on or off does not affect accuracy, but turning it on allows for a larger batch size, which can impact performance.
Generally, turning it on slows down the speed, but since it allows for a larger batch size, the total training time may actually be faster.
-
--xformers/--mem_eff_attnSpecifying the xformers option will use xformers' CrossAttention. If you do not have xformers installed, or if it causes an error (depending on the environment, such as when
mixed_precision="no"), you can specify themem_eff_attnoption instead to use the memory-efficient CrossAttention (slower than xformers). -
--clip_skipSpecify
2to use the output of the second-to-last layer of the Text Encoder (CLIP). If you specify 1 or omit the option, the last layer will be used.※Do not specify this option for SD2.0 training, as it uses the second-to-last layer by default.
If the target model for training has already been trained to use the second-to-last layer, specifying 2 may be better.
If not, and the last layer was used, the entire model has been trained with that assumption. In that case, retraining with the second-to-last layer may require a certain amount of training data and a longer training time to achieve desirable results.
-
--max_token_lengthThe default is 75. You can extend the token length to 150 or 225 for training. Specify this option when training with long captions.
However, since the token extension during training is slightly different from Automatic1111's Web UI (such as splitting specifications), it is recommended to train with 75 if not necessary.
Like clip_skip, it is assumed that training with a different length than the model's training state will require a certain amount of training data and a longer training time.
-
--weighted_captionsWhen specified, the same weighted captions as Automatic1111's Web UI will be enabled. This can be used for training methods other than "Textual Inversion and XTI". It is also effective for token strings of the DreamBooth method.
The notation for weighted captions is almost the same as that of the Web UI, with (abc), [abc], (abc:1.23), etc. available. Nesting is also possible. Do not include commas within parentheses, as this will cause the correspondence of parentheses to be incorrect in the shuffle/dropout of prompts.
-
--persistent_data_loader_workersSpecifying this in a Windows environment significantly reduces the waiting time between epochs.
-
--max_data_loader_n_workersThis option sets the number of processes for data loading. Having more processes speeds up data loading and allows for more efficient use of the GPU, but it consumes main memory. By default, it is set to the smaller of either
8orthe number of CPU concurrent threads - 1. If you have limited main memory or if the GPU usage rate is around 90% or higher, consider lowering this value to2or1while monitoring those numbers.
---CUT---
-
--logging_dir/--log_prefixThese options are related to saving the training logs. Please specify the log saving folder with the
logging_diroption. Logs in the TensorBoard format will be saved.For example, specifying
--logging_dir=logswill create alogsfolder in the working directory, and logs will be saved in a datetime folder within it. By specifying the--log_prefixoption, the specified string will be added before the datetime. Use it for identification purposes, such as--logging_dir=logs --log_prefix=db_style1_.To view logs in TensorBoard, open a separate command prompt and enter the following in the working directory:
tensorboard --logdir=logs(I think TensorBoard will be installed along with the environment setup, but if it's not, please install it with
pip install tensorboard.)Then open a browser and access http://localhost:6006/ to view the logs.
-
--log_with/--log_tracker_nameThese options are related to saving the training logs. In addition to
tensorboard, you can save logs towandb. For more details, please refer to PR#428. -
--noise_offsetThis option implements the following article: https://www.crosslabs.org//blog/diffusion-with-offset-noise
It seems that the quality of the generated images, which are overall dark or bright, may improve. It also appears to be effective in LoRA training. It is recommended to specify a value of about
0.1. -
--adaptive_noise_scale(experimental option)This option automatically adjusts the value of the noise offset according to the absolute value of the average of each channel of the latents. It is activated by specifying it simultaneously with
--noise_offset. The noise offset value is calculated asnoise_offset + abs(mean(latents, dim=(2,3))) * adaptive_noise_scale. Since the latents are close to a normal distribution, it might be a good idea to specify a value of about 1/10 of the noise offset.Negative values can also be specified, and in that case, the noise offset will be clipped to a minimum of 0.
-
--multires_noise_iterations/--multires_noise_discountThis option sets the Multi-Resolution Noise (pyramid noise). For more details, please refer to PR#471 and this page Multi-Resolution Noise for Diffusion Model Training.
Specifying a numeric value for
--multires_noise_iterationswill enable this feature. A value of around 6-10 seems to be suitable. Specify a value of 0.1-0.3 (recommended by the PR author for relatively small datasets such as LoRA training) or around 0.8 (recommended by the original article) for--multires_noise_discount(default is 0.3). -
--debug_datasetBy adding this option, you can check the image data and captions that will be used for training before actually starting the training. Press the Esc key to exit and return to the command line. Press the
Skey to advance to the next step (batch) and theEkey to advance to the next epoch.*Note: Images will not be displayed in Linux environments, including Colab.
-
--vaeWhen you specify either a Stable Diffusion checkpoint, VAE checkpoint file, or Diffusers model or VAE (both local or Hugging Face model IDs are acceptable) in the
vaeoption, the VAE will be used for training (during latents caching or latents acquisition).In DreamBooth and fine-tuning, the saved model will be a model that incorporates this VAE.
-
--cache_latents/--cache_latents_to_diskCaches the VAE output to main memory to reduce VRAM usage. This disables the use of augmentations other than
flip_aug. It also slightly speeds up overall training time.By specifying
cache_latents_to_disk, the cache will be saved to disk. The cache will still be effective even if the script is terminated and restarted. -
--min_snr_gammaSpecifies the Min-SNR Weighting strategy. For more details, please refer to this link. The recommended value in the paper is
5.
-
--save_precisionThis option specifies the data precision when saving. By specifying one of float, fp16, or bf16 in the
save_precisionoption, the model will be saved in that format (this does not apply when saving a Diffusers format model in DreamBooth or fine-tuning). Use this when you want to reduce the size of the model. -
--save_every_n_epochs/--save_state/--resumeBy specifying a numeric value for the
save_every_n_epochsoption, the model will be saved at each specified epoch during training.When specifying the
save_stateoption at the same time, the training state including the optimizer and other states will also be saved (although the model can be resumed from the saved state, this can be expected to improve accuracy and shorten training time). The saved state will be stored in a folder.The training state is output as a folder named
<output_name>-??????-state(where ?????? is the epoch number) in the saved location. Please use this option during long-lasting training sessions.To resume training from a saved state, use the
resumeoption. Specify the folder of the training state (not theoutput_dir, but the state folder inside it).Please note that due to the Accelerator specification, the epoch numbers and global steps are not saved, so they will start from 1 again when resumed.
-
--save_every_n_stepsBy specifying a numeric value for the
save_every_n_stepsoption, the model will be saved at each specified step during training. It can be specified simultaneously withsave_every_n_epochs.
---CUT---
-
--save_model_as(DreamBooth, fine-tuning only)Choose the model save format from
ckpt, safetensors, diffusers, diffusers_safetensors.Specify it as
--save_model_as=safetensors. If you load a Stable Diffusion format (ckpt or safetensors) and save it in the Diffusers format, the missing information will be supplemented by downloading the v1.5 or v2.1 information from Hugging Face. -
--huggingface_repo_idetc.If a huggingface_repo_id is specified, the model will be uploaded to HuggingFace at the same time as it is saved. Please be careful with the handling of access tokens (refer to HuggingFace's documentation).
Specify other arguments as follows:
--huggingface_repo_id "your-hf-name/your-model" --huggingface_path_in_repo "path" --huggingface_repo_type model --huggingface_repo_visibility private --huggingface_token hf_YourAccessTokenHere
If you specify
publicfor huggingface_repo_visibility, the repository will be published. If omitted or specified asprivate(or anything other than public), it will be private.If you specify the
--save_stateoption and also specify--save_state_to_huggingface, the state will be uploaded.If you specify the
--resumeoption and also specify--resume_from_huggingface, the state will be downloaded from HuggingFace and resumed. At that time, the--resumeoption will be--resume {repo_id}/{path_in_repo}:{revision}:{repo_type}.Example:
--resume_from_huggingface --resume your-hf-name/your-model/path/test-000002-state:main:modelIf you specify the
--async_uploadoption, the upload will be asynchronous.
-
--optimizer_typeSpecify the type of optimizer. The following can be specified:
- AdamW: torch.optim.AdamW
- Same as the unspecified option in previous versions
- AdamW8bit: Same arguments as above
- Same as the --use_8bit_adam option in previous versions
- Lion: https://github.com/lucidrains/lion-pytorch
- Same as the --use_lion_optimizer option in previous versions
- Lion8bit: Same arguments as above
- SGDNesterov: torch.optim.SGD, nesterov=True
- SGDNesterov8bit: Same arguments as above
- DAdaptation(DAdaptAdam): https://github.com/facebookresearch/dadaptation
- DAdaptAdaGrad: Same arguments as above
- DAdaptAdan: Same arguments as above
- DAdaptSGD: Same arguments as above
- AdaFactor: Transformers AdaFactor
- Any optimizer
-
--learning_rateSpecify the learning rate. The appropriate learning rate depends on the training script, so please refer to each description.
-
--lr_scheduler/--lr_warmup_steps/--lr_scheduler_num_cycles/--lr_scheduler_powerThese are the specifications for learning rate scheduler-related options.
With the lr_scheduler option, you can choose the learning rate scheduler from linear, cosine, cosine_with_restarts, polynomial, constant, constant_with_warmup, or any scheduler. The default is constant.
With lr_warmup_steps, you can specify the number of warm-up steps for the scheduler.
lr_scheduler_num_cycles is the number of restarts for the cosine with restarts scheduler, and lr_scheduler_power is the polynomial power for the polynomial scheduler.
For more details, please do your own research.
To use any scheduler, specify the optional arguments with
--scheduler_args, as with any optimizer.
Specify the optional arguments for the optimizer with the --optimizer_args option. You can specify multiple values in the key=value format, and multiple values can be specified for the value, separated by commas. For example, to specify arguments for the AdamW optimizer, use --optimizer_args weight_decay=0.01 betas=.9,.999.
When specifying optional arguments, please check the specifications of each optimizer.
Some optimizers have required arguments that are automatically added if omitted (such as the momentum for SGDNesterov). Please check the console output.
The D-Adaptation optimizer automatically adjusts the learning rate. The value specified for the learning rate option is not the learning rate itself, but the application rate of the learning rate determined by D-Adaptation, so normally specify 1.0. If you want to specify half the learning rate for the Text Encoder and the full learning rate for U-Net, use --text_encoder_lr=0.5 --unet_lr=1.0.
The AdaFactor optimizer can automatically adjust the learning rate by specifying relative_step=True (added by default when omitted). When adjusting automatically, the adafactor_scheduler is forcibly used for the learning rate scheduler. Also, it seems to be good to specify scale_parameter and warmup_init.
When adjusting automatically, the option specification is like --optimizer_args "relative_step=True" "scale_parameter=True" "warmup_init=True".
If you do not want to adjust the learning rate automatically, add the optional argument relative_step=False. In that case, it is recommended to use constant_with_warmup for the learning rate scheduler and not to clip the gradient norm. Therefore, the arguments are like --optimizer_type=adafactor --optimizer_args "relative_step=False" --lr_scheduler="constant_with_warmup" --max_grad_norm=0.0.
If you want to use an optimizer from torch.optim, specify only the class name (e.g. --optimizer_type=RMSprop) or use the "module name.class name" (e.g. --optimizer_type=bitsandbytes.optim.lamb.LAMB) for optimizers from other modules.
(Only importlib is used internally, and the operation is unconfirmed. Please install the necessary packages if needed.)
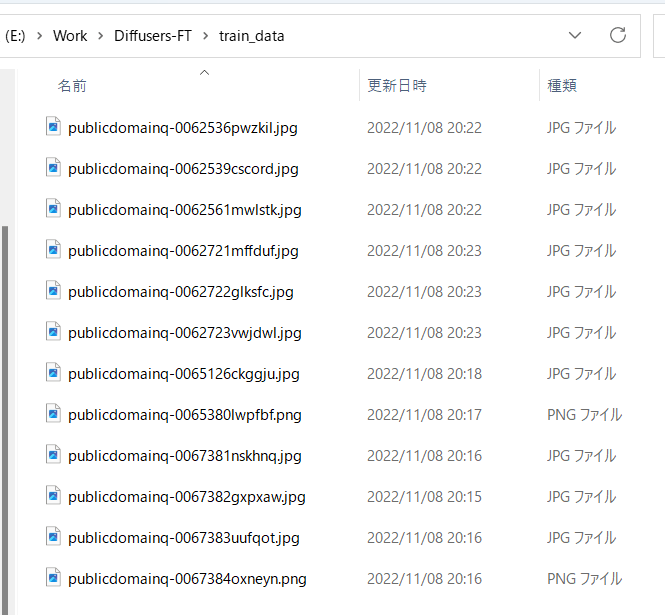
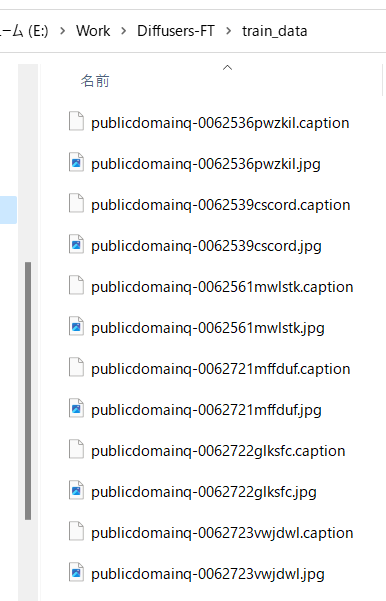
As previously mentioned, prepare the image data you want to train and put it in any folder.
For example, store the images as follows:
Skip this step if you are training with tags only and not using captions.
If you are preparing captions manually, put the captions in the same directory as the teacher data images, with the same file name and a .caption extension. Each file should be a single-line text file.
In the latest version, downloading BLIP, downloading weights, and adding a virtual environment are no longer necessary. It works as is.
Run the make_captions.py script in the finetune folder.
python finetune\make_captions.py --batch_size <batch_size> <teacher_data_folder>
If the batch size is 8 and the teacher data is placed in the parent folder train_data, it will look like this:
python finetune\make_captions.py --batch_size 8 ..\train_data
The caption files will be created in the same directory as the training data images, with the same file name and a ".caption" extension.
Adjust the batch size according to your GPU's VRAM capacity. A larger batch size will speed up the process (it can be increased further for VRAM 12GB). You can specify the maximum length of captions using the "max_length" option. The default is 75, but you may want to increase it if you are training the model with a token length of 225. You can also change the caption file extension using the "caption_extension" option. The default is ".caption" (changing it to ".txt" may cause conflicts with DeepDanbooru mentioned later).
If you have multiple training data folders, run the command for each folder separately.
---CUT---
Please note that the inference has randomness, so the results may change each time it is executed. To fix the results, specify a random seed with the --seed option, such as --seed 42.
For other options, please refer to the help with --help. Unfortunately, there seems to be no comprehensive documentation on the meaning of the parameters, so you may need to look at the source code.
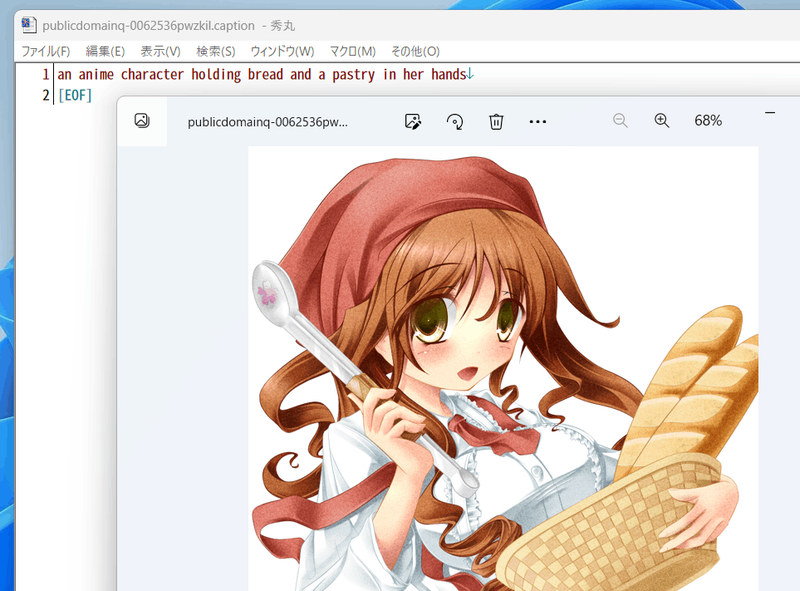
By default, the caption files are generated with the .caption extension.
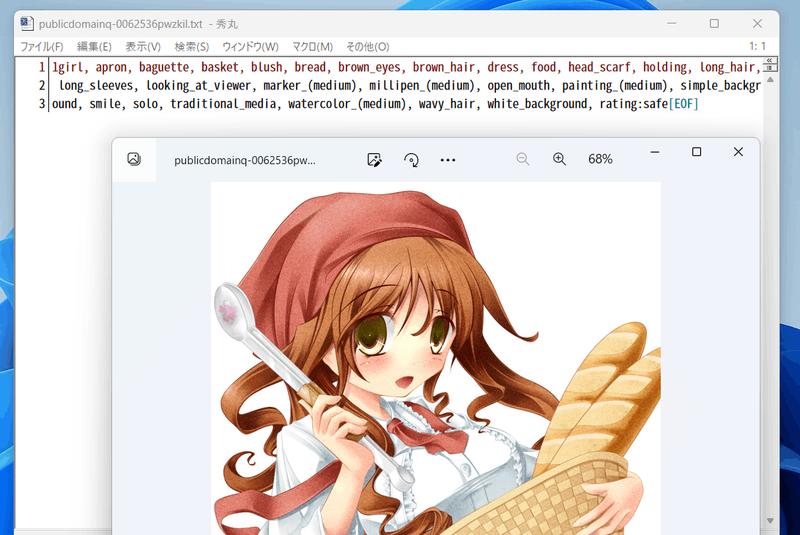
For example, the following captions will be attached.
If you do not want to perform tagging with danbooru tags, please proceed to "Preprocessing of captions and tag information."
Tagging is done with either DeepDanbooru or WD14Tagger. WD14Tagger seems to have better accuracy. If you want to tag with WD14Tagger, please proceed to the next chapter.
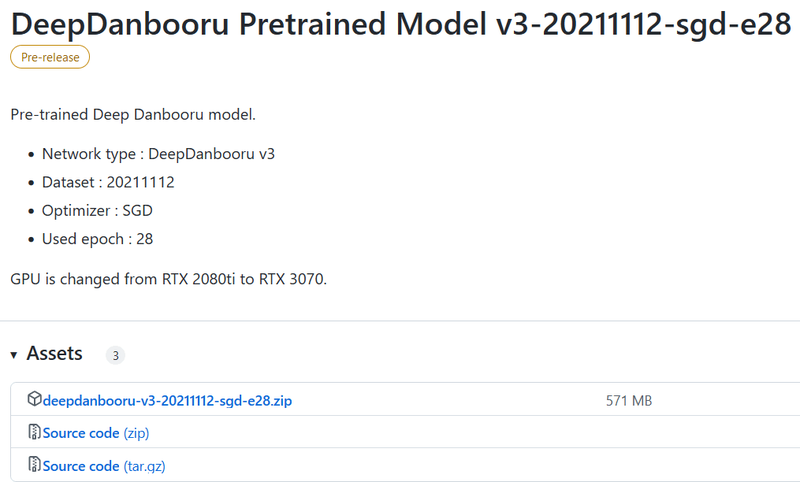
Clone DeepDanbooru (https://github.com/KichangKim/DeepDanbooru) into your working folder or download and unzip the zip file. I unzipped the zip file. Also, download deepdanbooru-v3-20211112-sgd-e28.zip from the Assets of "DeepDanbooru Pretrained Model v3-20211112-sgd-e28" on DeepDanbooru's Releases page (https://github.com/KichangKim/DeepDanbooru/releases) and unzip it into the DeepDanbooru folder.
Download from the following link. Click Assets to open and download from there.
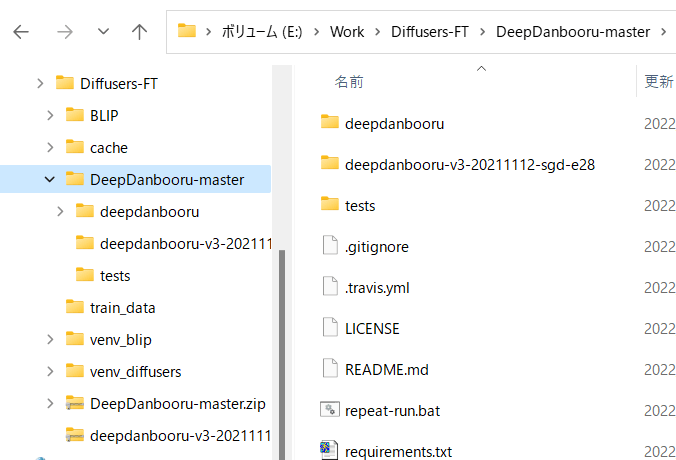
Please set up the directory structure like this:
Install the necessary libraries for Diffusers' environment. Move to the DeepDanbooru folder and install (I think this will effectively only add tensorflow-io).
pip install -r requirements.txt
Next, install DeepDanbooru itself.
pip install .
Now the environment for tagging is ready.
Move to the DeepDanbooru folder and run deepdanbooru to perform tagging.
deepdanbooru evaluate <teacher data folder> --project-path deepdanbooru-v3-20211112-sgd-e28 --allow-folder --save-txt
If you placed the teacher data in the parent folder train_data, it would look like this:
deepdanbooru evaluate ../train_data --project-path deepdanbooru-v3-20211112-sgd-e28 --allow-folder --save-txt
Tag files are created in the same directory as the teacher data images, with the same file name and a .txt extension. Since they are processed one by one, it is relatively slow.
If you have multiple teacher data folders, please run for each folder.
The files are generated as follows:
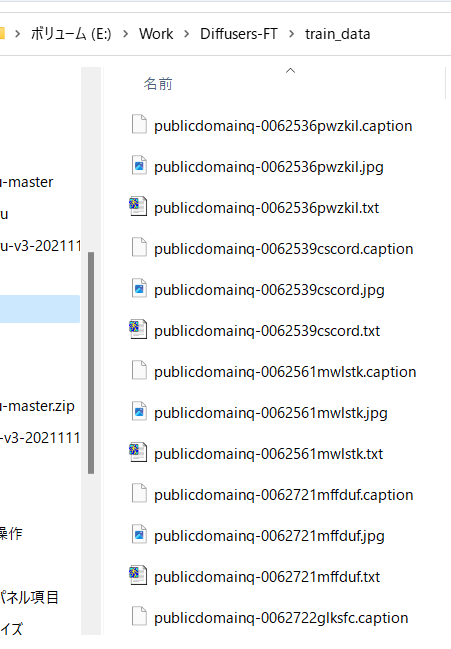
Tags are attached like this (with a lot of information...).
This is the procedure for using WD14Tagger instead of DeepDanbooru.
We will use the tagger used in Automatic1111's WebUI. I referred to the information on this GitHub page (https://github.com/toriato/stable-diffusion-webui-wd14-tagger#mrsmilingwolfs-model-aka-waifu-diffusion-14-tagger).
The necessary modules are already installed in the initial environment setup. Also, the weights will be automatically downloaded from Hugging Face.
Run the script to perform tagging.
python tag_images_by_wd14_tagger.py --batch_size <batch size> <teacher data folder>
If the teacher data is placed in the parent folder train_data, it would look like this:
python tag_images_by_wd14_tagger.py --batch_size 4 ..\train_data
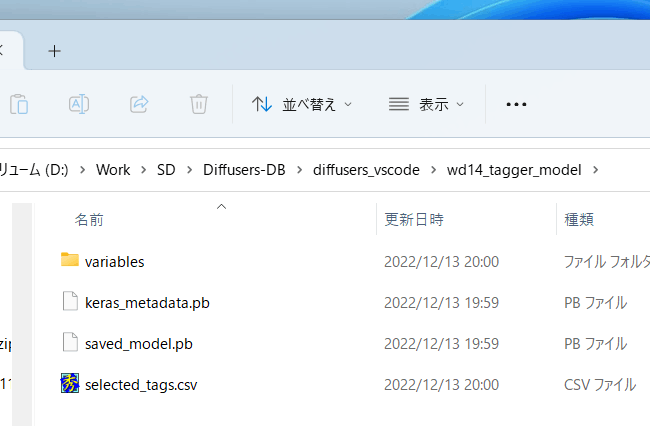
On the first launch, the model file will be automatically downloaded to the wd14_tagger_model folder (you can change the folder with an option). It will look like this:
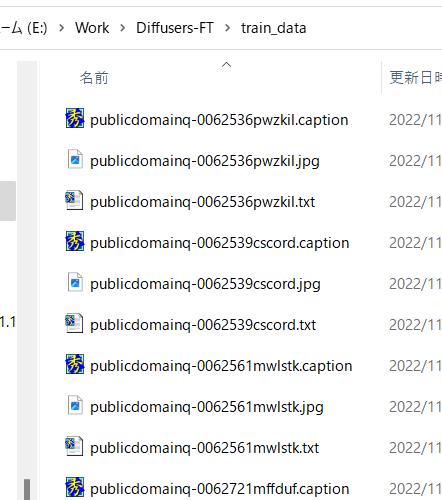
Tag files are created in the same directory as the teacher data images, with the same file name and a .txt extension.
You can specify the threshold for tagging with the thresh option. The default is 0.35, the same as WD14Tagger's sample. Lowering the value will result in more tags being attached, but the accuracy will decrease.
Please adjust the batch size according to your GPU's VRAM capacity. The larger the size, the faster the process. You can change the tag file extension with the caption_extension option. The default is .txt.
You can specify the model's save folder with the model_dir option.
If you specify the force_download option, the model will be redownloaded even if the save folder exists.
If you have multiple teacher data folders, please run for each folder.
To make it easier to process captions and tags with a script, they are combined into a single file as metadata.
To include captions in metadata, execute the following in your working folder (if you don't want to use captions for learning, you don't need to run this) (actually, write in one line, same for below). Specify the image file location in full path with the --full_path option. If you omit this option, the path will be recorded as a relative path, but you will need to specify the folder separately in the .toml file.
python merge_captions_to_metadata.py --full_path <teacher data folder>
    --in_json <input metadata file name> <metadata file name>
The metadata file name can be any name. If the teacher data is train_data, there is no input metadata file, and the metadata file is meta_cap.json, it looks like this:
python merge_captions_to_metadata.py --full_path train_data meta_cap.json
You can specify the caption extension with the caption_extension option.
If you have multiple teacher data folders, specify the full_path argument and run for each folder.
---CUT---
python merge_captions_to_metadata.py --full_path
    train_data1 meta_cap1.json
python merge_captions_to_metadata.py --full_path --in_json meta_cap1.json
    train_data2 meta_cap2.json
If you omit the in_json option, the script will read from and overwrite the existing metadata file.
*Note: It is safer to change the in_json option and the output metadata file for each run.
Similarly, you can also merge tags into the metadata (this step is not necessary if you don't want to use tags for training).
python merge_dd_tags_to_metadata.py --full_path <supervised_data_folder>
    --in_json <input_metadata_filename> <output_metadata_filename>
If you have the same directory structure as before, you would read from meta_cap.json and write to meta_cap_dd.json as follows:
python merge_dd_tags_to_metadata.py --full_path train_data --in_json meta_cap.json meta_cap_dd.json
If you have multiple supervised data folders, execute the script for each folder by specifying the full_path argument.
python merge_dd_tags_to_metadata.py --full_path --in_json meta_cap2.json
    train_data1 meta_cap_dd1.json
python merge_dd_tags_to_metadata.py --full_path --in_json meta_cap_dd1.json
    train_data2 meta_cap_dd2.json
If you omit the in_json option, the script will read from and overwrite the existing metadata file.
*Note: It is safer to change the in_json option and the output metadata file for each run.
By this point, both captions and DeepDanbooru tags should be combined in the metadata file. However, automatically generated captions may have inconsistent notation (e.g., girl/girls/woman/women), and tags may contain underscores or ratings (in the case of DeepDanbooru). It is recommended to clean captions and tags using a text editor's replace feature or a similar tool.
There is a script provided for cleaning captions and tags. Edit the script according to your needs and run it as follows:
(No need to specify the supervised data folder. The script will clean all data within the metadata file.)
python clean_captions_and_tags.py <input_metadata_filename> <output_metadata_filename>
Please note that the --in_json option is not used in this case. For example:
python clean_captions_and_tags.py meta_cap_dd.json meta_clean.json
This completes the preprocessing of captions and tags.
*Note: This step is not mandatory. You can also train while fetching latents during training. Pre-fetching latents is not possible if you apply random_crop or color_aug during training (as the images change for each training iteration). In that case, you can proceed with the metadata obtained so far.
By pre-fetching the latent representations of the images and saving them to disk, you can speed up the training process. Additionally, this step performs bucketing (classifying supervised data according to aspect ratio).
In the working folder, enter the following command:
python prepare_buckets_latents.py --full_path <supervised_data_folder>
    <input_metadata_filename> <output_metadata_filename>
    <fine-tuning_model_name_or_checkpoint>
    --batch_size <batch_size>
    --max_resolution <resolution_width,height>
    --mixed_precision <precision>
For example, if your model is model.ckpt, batch size is 4, training resolution is 512x512, and precision is "no" (float32), you would read from meta_clean.json and write to meta_lat.json as follows:
python prepare_buckets_latents.py --full_path
    train_data meta_clean.json meta_lat.json model.ckpt
    --batch_size 4 --max_resolution 512,512 --mixed_precision no
The latents will be saved in the supervised data folder as numpy npz files.
You can specify the minimum bucket resolution with the --min_bucket_reso option and the maximum with the --max_bucket_reso option. The defaults are 256 and 1024, respectively. For example, if you set the minimum size to 384, resolutions like 256x1024 or 320x768 will no longer be used.
If you increase the resolution to, say, 768x768, you might want to set the maximum size to 1280 or similar.
The --flip_aug option enables left-right flip augmentation, which can effectively double the amount of data. However, this may not work well for non-symmetrical data (e.g., character appearance or hairstyle).
If you have multiple supervised data folders, execute the script for each folder by specifying the full_path argument.
python prepare_buckets_latents.py --full_path
    train_data1 meta_clean.json meta_lat1.json model.ckpt
    --batch_size 4 --max_resolution 512,512 --mixed_precision no

python prepare_buckets_latents.py --full_path
    train_data2 meta_lat1.json meta_lat2.json model.ckpt
    --batch_size 4 --max_resolution 512,512 --mixed_precision no
It is possible to use the same input and output metadata files, but using separate files is safer.
*Note: It is safer to change the input and output metadata filenames for each run.